
Want to learn how to fly RC helicopters? Do you want to eventually be able to pilot like this guy? :
https://www.youtube.com/watch?v=l5FqYiZb_5s
If so, read on!
How to fly RC helicopters : Picking the right RC helicopter for beginners
Note: Read our in-depth guide on how to choose RC helicopters.
Toy grade vs Hobby grade
Beginner hobbyists should first understand the difference between toy grade and hobby grade RC helicopters. Toy grade helicopters are definitely the cheapest you can get but I would say these aren’t worth it if you want to actually get into the hobby, even as a beginner.
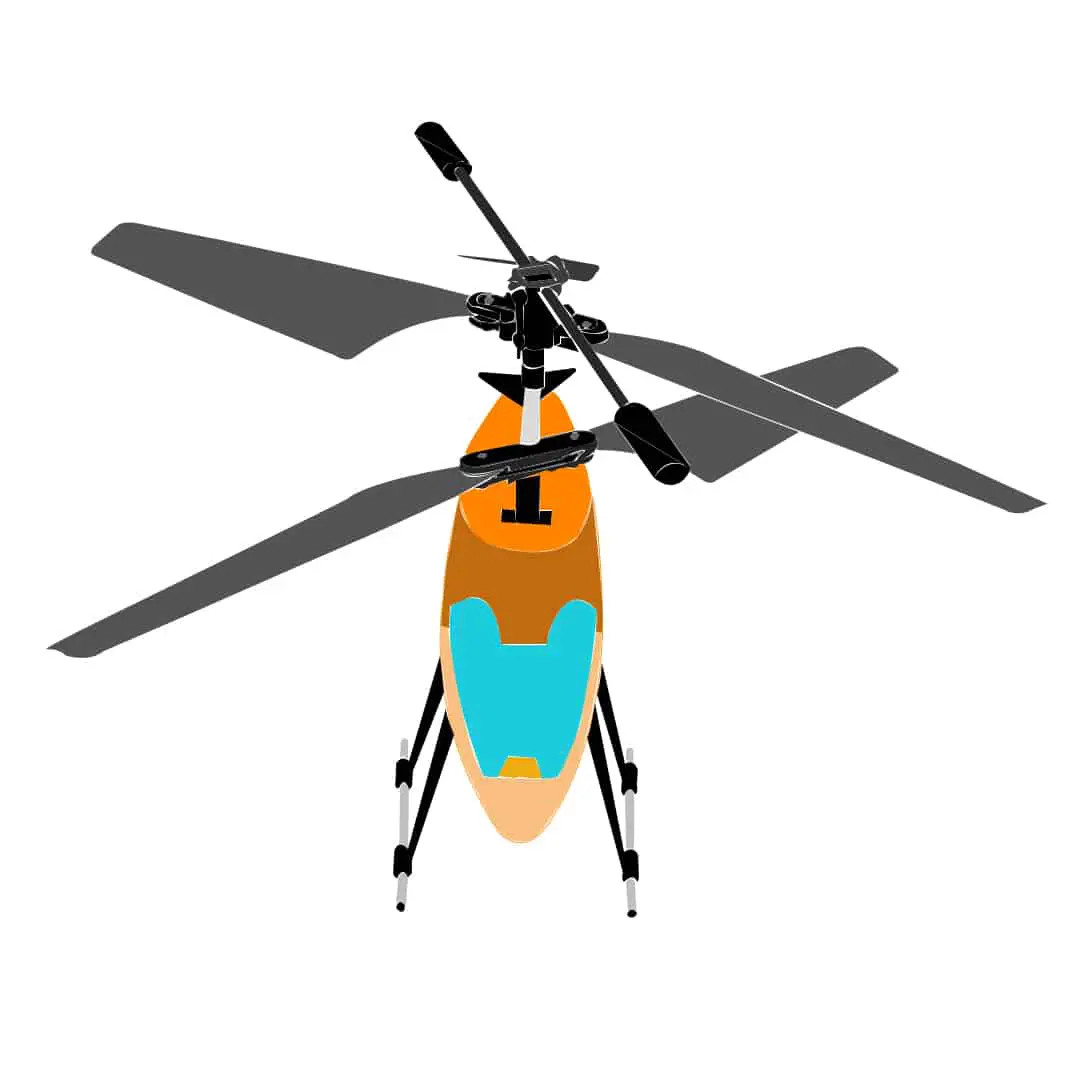
Toy grade helicopters usually range from having 2 channels (throttle and rudder) to 3 channels (throttle, rudder and elevator). They also lack a swash-plate, which is essentially the part of the helicopter that directs the rotor blade, thus severely limiting directional control.
Toy grade helicopters are usually thrown in the trash if it crashes or gets damaged because spare parts for this grade of helicopters are generally unavailable. If you want a beginner RC helicopter to start and practice on before getting fancier ones, we would recommend that you stay away from Toy grade helicopters.
Hobby grade varieties

Learn how to fly RC helicopters on coaxial helicopters
As a beginner, coaxial helicopters are probably your best bet. These helicopters have two rotors one on top of the other and rotate in opposite directions. This results in a cancelling of torque reaction (spinning effect) that each rotor has, on the main body of the copter. Therefore, coaxial helicopters do not require a tail rotor.
They are the most stable flying copters among the different varieties. They are generally not very reactive (or ‘snappy’) to control inputs and therefore, very ideal for beginners. You can get them in size ranges from small to mid-range, making them great indoor and outdoor flyers.
They are also relatively cheap, compared to fancier helicopters and spare parts are readily available and cheaply replaceable, which makes them even more ideal for beginners.
The major drawback with this type of helicopter is that they lack the ability to fly in windy conditions. Due to their lack of responsiveness, there is little you can do to counteract wind when flying outdoors.
The other drawback is that you cannot perform advanced maneuvers with them. This may not be your concern as a beginner, but as you progress and get into the hobby, you may need to invest in something fancier
Fixed pitch helicopters
Next up in the ladder, in terms of difficulty in learning how to fly RC helicopters are ‘fixed pitch’ helicopters. Note that most coaxial helicopters are also ‘fixed pitch’, the term is used to describe helicopters that have a tail rotor (to balance for the torque reaction), but the ‘pitch’ or angle of attack of the rotors of these types of RC helicopters are ‘fixed’.
Like Coaxial helicopters, the amount of lift in this type of helicopter is proportional to the amount of throttle input or the rotation of the motors. The higher the throttle, the more lift produced. These helicopters also come in small to mid sizes and can be flown indoors and outdoors.
They are typically more responsive than coaxial helicopters and can perform some basic aerobatic maneuvers. However, they are less stable and also have a steeper learning curve when you are learning how to fly RC helicopters. They are also fairly inexpensive and the parts are cheaply replaceable, much like the coaxial copters.
If you are an adventurous beginner and love a challenge, you could directly go for the fixed pitch helicopter. It will definitely require more patience in the beginning, but it will also make you a better pilot overall and prepare you for collective pitch helicopters.
Master how to fly RC helicopters on collective pitch helicopters
Collective pitch helicopters are the most advanced type of helicopters and are really only recommended after you have mastered how to fly RC helicopters with the coaxial and/or fixed pitch helicopters.
With these helicopters, the lift is not produced by upping the throttle. Rather, the ‘angle of attack’ or pitch of the rotor blades are varied to either gain or lose altitude, while the spinning speed of the rotor blade remains constant.
This results in ‘snappy’ reaction to control inputs and this is what is required for advanced maneuvers like inverted flying and ‘tic-tock’. Ever seen a pro RC helicopter pilot fly an RC helicopter, doing crazy insect like maneuvers? You better bet they’re flying a collective pitch RC helicopter.
Collective pitch helicopters generally come in mid-large sizes and are meant for outdoor flying for the most part. Large collective pitch helicopters have a significant advantage in windy conditions relative to any other type of helicopter.
Keep in mind that these helicopters are relatively expensive and spare parts aren’t typically that cheap either. It is therefore recommended that you get used to basics on how to fly RC helicopters and progress to basic collective pitch controls (maybe even use a flight simulator to learn) before attempting advanced maneuvers.
Understanding the RC Helicopter before learning how to fly RC helicopters
Helicopter flight basics
So how exactly does your helicopter fly? Now even though specifics of aviation are beyond the scope of this post, it might be useful to have a really basic understanding of how the helicopter actually gets up in the air.
One of the ‘forces’ that is responsible for generating lift in any flying machine – be it helicopters, multi-rotors or helicopters is the effect of Bernoulli’s principle. I have covered some of the basics in quadcopter flight mechanics post and most of the same principles apply here.
The basic idea behind this is that from the rotor motion through the wind, low pressure air is created at the top while the air below is relatively higher pressure. With Bernoulli’s principle in action, the higher pressure air will tend to travel toward the lower pressure air, generating the ‘lift’.

Newton’s third law of motion also comes into play in generating the lift. Air is a fluid, like water. The airflow from the rotors pushes downwards, creating the ‘action’. The ‘reaction’ is the lift.
This is a very simplistic explanation of how things work. Comprehensive books have been written about this subject. If you are interested in knowing more, you might want to pick up a book on helicopter aerodynamics!
Helicopter controls: pitch and rotors
Cyclic pitch
In hobby helicopters that have a swash-plate, the ‘cyclic pitch’ determines the direction of flight – forward, backward, left and right. It is essentially a pitch caused by the ‘tilting’ of the swash-plate of the rotors, lifting individual blades on the rotors, giving it direction.
For example, to pitch forward, the swash plate has to create a cyclic pitch lifting the individual blade in a certain direction. Your intuition will probably be that in order to go forward, you have to increase the lift of the blade at the back of the helicopter (when it is there), so that the helicopter as a whole points nose in, going forward.
However, that is not the case. Rotor blades work on a principle called gyroscopic precession. What this basically means is that in order to make a movement in any direction, the lift from the cyclic pitch has to be done at 90 degrees before the desired direction of effect.
As an example, if you imagine that you are facing the direction the RC helicopter is facing and assume that the rotor is spinning clockwise, in order to pitch forward, the lift has to be generated at the right of the helicopter!

This will mean that the effect of the lift will be at the backside, due to the phenomenon of gyroscopic precession, tilting the helicopter forward, enabling it to move forward.
Collective pitch and fixed pitch
The collective pitch is really a functionality in more advanced helicopters. Hence the name ‘collective pitch’ helicopters. It is essentially the upward and downward movement of the swash-plate, changing the pitch of all the rotor blades at the same time and this is what makes the helicopter gain or lose altitude.
What is the advantage of this you ask? Well, you get to keep the rotor speed constant. With cyclic pitch, the lift of the helicopter is not dependent on the rotor speed (unlike fixed pitch RC helicopters).
What is the big deal about keeping the rotor speed constant? A snappier, more responsive helicopter! Think about it, if you really were to depend on increasing throttle speed each and every time to make a maneuver, it wouldn’t be prompt and ‘snappy’.
You need to be able to have a constant, fast rotor speed at all time, independent of altitude, to have that ‘snappy’ response. With fixed pitch, you most definitely cannot have a maxed out rotor speed at all times because the ‘lift’ is dependent on rotor speed, making it gain altitude indefinitely, till you lose transmitter range or run out of battery.

The transmitter
Lastly, you need to understand the controls of your helicopter. Here is a description that would apply to most transmitters:

Note: Control specifics may not be exactly the same as in the picture above. Check the manual! Especially in the case of number 2 and 3, it may vary!
- Power is to turn the transmitter on and off
- This stick is for both Aileron/Roll and Throttle for coaxial and fixed pitch helicopters. Throttle determines how high your RC helicopter will go. This is essentially the accelerator for your RC helicopter. In case of collective pitch RC helicopters, throttle control is replaced by the ‘collective pitch’ control, which controls the altitude of the craft. Aileron (or Roll) is used to sway the RC helicopter sideways, either to the left or to the right.
- This stick is for both Elevator and Rudder. Elevator control is used to pitch the RC helicopter. That is, to move it forward and backwards. The rudder control is used to yaw the RC helicopter. That is, to rotate it about its axis.
- Power indicator determines how much power is left.
- Bigger antenna usually is better.
6 to 9. Dual rate controls can be used to switch up how sensitive each control is. This is essentially ‘tuning’.

Pre-flight checks and things to remember before you fly RC helicopters
- Check if the rotor blades are free to rotate without friction. Foreign objects such as dust, hair etc. can have an effect on how freely the rotor blades can move, drastically reducing flight times and overall flight speed, lift and efficiency.
- Check for damages or bends in linkages, rotor blades, skids, fly-bar and stabilizers. Ensure that the ballings are all fixed properly and that the head of the blades are nice and tight.
- Ensure that the battery is charged, balanced and properly taken care of to maintain optimal flight times.
- Make sure that the transmitter is bound to the helicopter and that the trims are set properly. You do not want flight aberrations from trim settings.
- Ensure that the RC helicopter is kept at a safe distance from you and other people, pets or objects while taking off.
- If you feel like your helicopter is about to crash, turn down the throttle to minimize damages.
This is far from an all-encompassing list. Here is a more detailed pre-flight checklist. Here is a decent video explaining a good number of pre-flight things to do:
Choosing the right place to fly while learning how to fly RC helicopters
Much of what has to be said about learning to choose the right place (which is a really important step to learning how to fly RC helicopters), I have already mentioned in my other ‘how to fly’ articles. Nevertheless, for ease of access, I’ll reiterate here.
The principal thing you have to do before you take off, is to check the climate. This is particularly valid for newbies. In the event that it is excessively breezy, making it impossible to fly, pick another spot or day. On the off chance that it is winter at this moment, pick another season. Winter is a bad time for a novice to get into the RC flying, unless you have a specialist companion to watch you and safeguard you out if things go south.
On the off chance that you can’t sit tight for winter to be over, utilize a flight simulator rather than really taking off. Trust me, the odds of your helicopter slamming down are already high. The eccentrics of winter will just aggravate it. Spare yourself from the loss of cash and the dissatisfaction.
If the climate conditions are all great, where do you go to fly your RC helicopter? Pick an open spot where there are almost no individuals, pets or objects, for example, trees around.
Pay special mind to RC flying clubs in your neighborhood. They more often than not have their own particular flying spaces and are perfect for fledglings. Individuals from such clubs can be to a great degree supportive to you as a learner and their direction can be significant.
Ensure that you avoid spots where your RC helicopter can possibly collide with individuals. This can’t be focused on enough. Propeller strikes for instance, can be damaging as well death causing. You would prefer not to get into inconvenience due to your RC hobby!
Other spots to abstain from flying close are airports, development destinations and atomic plants. Flying close to airports can be to a great degree unsafe as your RC helicopter can collide with life sized passenger crafts bringing about devastating results. You would prefer not to be the reason behind that!
How to fly RC helicopters : Basic Flight
Lesson 1: Basic flight and hovering
Okay newbie, time to finally go out and learn how to fly RC helicopters. The very first thing you will need to do is to learn how to hover your RC helicopter in place. This will be different for different types of RC helicopter.
For example, coaxial helicopters will be much more stable relative to fixed pitch and collective pitch helicopters that depend on a tail rotor to stabilize the craft. It will be much easier to hover a coaxial helicopter.
For helicopters that do not stabilize easily, you have to first learn how to make micro corrections on the different controls to have a stable craft. It is important to remember not to push the controls too drastically while you learn how to fly RC helicopter. That is not how you hover a craft.
Throttle up to about a little but more than half throttle to get your craft up in the air just above the ground in the case of coaxial and fixed helicopter. Keep the throttle stable at around that range and adjust the roll, pitch and rudder controls (depending on how many channels your helicopter has). With collective pitch helicopters, you have to play around with the collective pitch.
Your goal with this mission is to master hovering in place. This will make your neurons adapt to the responsiveness of your RC helicopter. The time it may take to master the hover will depend on what kind of RC helicopter you are flying. A collective pitch RC helicopter for example, will take a lot more time to master than a coaxial helicopter.
Remember to keep the helicopter facing the same direction you are facing or else the controls will behave differently, especially when the helicopter is facing directly towards you. Master one direction before you master other directions.
Lesson 2: Simple Turns
Your next lesson in learning how to fly RC helicopters is to learn how to go forward and backward and make simple, momentum free turns. Focus on mastering one turn control of the cyclic at a time. For example, if your helicopter is a 4 channel helicopter, first learn how to go forward using the pitch/elevator control and turn using the yaw/rudder control.
Once you get a feel for how the turns work with yaw/rudder control by repeated practice (fly multiple times in a square for example), tinker around with the aileron/roll control of the cyclic.
With this exercise, keep a low altitude (just about chest height would be ideal). This will let you observe how the craft flies in relation to your control input. Do not fly too high as it will make it difficult to note how the craft behaves and do not fly too low as you are at risk of crashing.
Remember – do not go all the way with the control inputs. Keep it small. This is especially true with more reactive helicopters like the fixed pitch and collective pitch helicopters.
Learn to get used to making turns in different altitudes.
Lesson 3: Angled turns, figure 8s and mastering the cyclic controls
Time to mix things up. In this lesson on how to fly RC helicopters, you have to learn how to mix the elevator/pitch, aileron/roll, rudder/yaw controls to make momentum based and angled turns. While making these turns you will notice that you lose some altitude. Hence it is important to apply the elevator control AND throttle/collective pitch input at the same time to maintain altitude.
Gradual turns

At first, focus on learning to make gradual turns instead of making sharp, momentum based turns. With these, you will need to input the elevator, a tad bit of rudder to make the gradual turn and a small amount of aileron.
Momentum based tail turns

After getting a hang of this, it is time to move onto learning how to make momentum based turns using the rudder control. Basically, with this turn, you ‘whip’ the tail of your helicopter at the turns and use the momentum to propel the craft forward or level the helicopter out and continue from there.
Understand that this might feel completely different from what you are regularly used to when you started off learning how to fly RC helicopters, so take your time in mastering it. Be liberal with the altitude!
Angled Momentum turns

To make angled momentum turns, you have essentially ‘tilt’ the helicopter using the aileron control and pull on the elevator and throttle up to maintain the altitude. In case you are using a cyclic pitch helicopter, swap throttle for ‘cyclic pitch’
Make sure that your helicopter doesn’t angle down and crash in the process! It is also important to note that you mustn’t overly apply the aileron control while making the ‘tilt’. This will make the helicopter circle around fast like it is inside a hurricane. As a beginner, you do not want this as this can lead to a crash.
Keep the tilt small!
Figure 8s

After you have got a hang of making angled turns, it is now time to learn how to fly in ‘figure 8s’. This is the step where you stop being a total newbie to flying RC helicopters. At first, do not attempt to make small and sharp figure 8 maneuvers. It is recommended that you learn how to make large and gradual figure 8s before you proceed to sharp figure 8s. Unlike the previous lessons it is recommended that you practice figure 8s at a high altitude for crash safety.
Take your time with the process of adapting yourself to how all the controls work together. This will prepare you and improve your dexterity to a level where you can perform advanced maneuvers with your RC helicopter.
Remember to practice flying the figure 8s in both clockwise and counter-clockwise directions – you can’t be lopsided in learning how to fly RC helicopters!
How to fly RC helicopters : Advanced Maneuvers (Requires an advanced, collective pitch helicopter)
If you have taken your time to master hovering, and other basics of how to fly RC helicopters, you should be skilled enough to start learning advanced maneuvers. However, remember that much of this will require a collective pitch helicopter. Due to its pricey nature and the HIGH risk of crashing from learning, I recommend that you practice these maneuvers in a flight simulator before attempting them on an actual helicopter!
Lesson 4: Fly RC Helicopter Upside down – Flips and Inverted flying

If it is your first time attempt at inverted flying, take your helicopter high up in altitude for crash safety! You can get into an inverted flight from either front flip, back flip or rolls. Personally, I find the roll variations easier.
However, I think it is worthwhile to master the flip variations as these not only look cooler, but will also train your skill and dexterity for more advanced maneuvers down the line.
I recommend that you take your helicopter to a distance away from you so that it doesn’t flip into you! In order to do a flip, you first hover at a slight positive pitch, pull back on your elevator and as it transitions into inverted flight, change the pitch to make it slightly negative (reversed control)

Remember that the elevator controls and rudder also get reversed in inverted flight. In order to make it easier, you might want to focus your attention on the tail as it will behave like the nose during inverted flight. The aileron control remains the same
In order to have a stable hover, you have to leave it at that slight negative collective pitch much like how in a normal hover, you would give a slightly positive collective pitch. Remember to be restricted with your collective pitch controls, unless you want the helicopter to go crazy!
In order to get back into normal position, pull back on the elevator again and as it transitions into upright position from inverted, change back the pitch from the slight negative to slight positive.
In order to make a forward flip, push the elevator up instead of pulling on it.
In order to truly master inverted flight, I recommend you learn how to hover, make turns and make figure 8s in an inverted position! It is also important to get used to transitioning into and out of inverted flight in a smooth fashion.
Learn all the possible orientations – tail-in, nose-in and everything in between.
Here is a nice video demonstration for how to go about inverted flying:
https://www.youtube.com/watch?v=q–rcHGsEHI
Lesson 5: Flip and roll combos
At this point, you should be pretty comfortable with flying in both upright and inverted positions. In this lesson you get to exercise your dexterity for making flips and rolls even further by doing some combinations of both.
For example, make a front flip first, rotate the tail and get back by making a back-flip. Or you could front flip, tail rotate and make a roll to get back to the original position. Mix and match for cool looking effects!
Again, remember – go high up in altitude for crash protection J
Here is a cool video of someone demonstrating loops, rolls and flips:
Lesson 6: Hard Stops
This is where things start to look really cool. It also sounds cool! This IS what makes helicopters look and sound snappy and nimble!
First, you need to get used to the stalling position. You must have some practice now, after working on your front flips and back-flips. If not, go back and practice the intermediate position during the flips – the stalling position.
Now, to perform your first hard stop, first head high up in the air, and do a front flip or back flip to inverted position. Only this time, as the helicopter transitions to the inverted position, instead of making the collective pitch to slightly negative, nudge it slightly even further down negative and bring it back to slight negative (or near center) IMMEDIATELY. Notice how your helicopter appeared to make a hard stop? Congratulations. You’ve successfully performed your hard stop!
But this is only the beginning. You can repeat the same for rolls, half flips, and hard drops – most maneuvers you can conceive of. It might be difficult at first, but once you have enough practice, this will become second nature and you will start doing it back to back!
Lesson 7: Tick-Tocks
If you have made it this far and especially if you have mastered hard-stops, I would say you are ready to start learning ‘tick-tocks’. The ‘tick-tock’ is a really advanced maneuver and will require a lot of time to really get used to. If you have mastered this, you must have pretty much mastered how to fly RC helicopters by now It has plenty of variations in itself and you could mix and match tick-tock variations all day long to create an amazing display of aerobatics!
Before you learn to do a full blown tick-tock, I recommend that you learn how to do rainbows. Rainbows are essentially a gradual and long tick-tock variation. After you get really used to that variation, proceed to a slow, short tick tock. Master that before heading to learn the quicker version.

You could do either elevator based and aileron based tick-tocks or a back to back combination of both.
Patience is key here and I would ALWAYS recommend starters to practice this in a flight simulator before actually trying it out in a real copter. Here is a good video demonstration of how to learn tick tocks:
It is important to remember to keep the cyclic controls in a straight line. For example, if you are doing an elevator tick-tock, even a slight bit of aileron control can take your copter off the tick-tock!
Lesson 8: Pirouetting
Welcome back to hovering! Only this time, it is going to be way harder. Your goal with this exercise is to use you rudder control to rotate around your copter while maintaining the hover. Start off with a slow rudder and proceed to learn how to do the same with a fast rudder.
This is going to be way harder than the traditional hover because of the constant changing of orientation. Hence it is very important to master orientations before attempting pirouette.
Learn both right side up and inverted pirouette hovering.
The next step is to learn how to do pirouette rotations with the rudder while traveling forward and backward. You have to slowly make your way to pirouette flips and other advanced maneuvers with the pirouette. Really, the pirouette deserves a post of its own. Here is a nice video demonstration that guides through a lot of pirouette maneuvers:
Conclusion
Practice, practice! Playing around with and doing cool maneuvers with your very own special RC helicopter is probably one of the most fun things one can do in life. It never gets old! However, to get to that point, you WILL need to be patient in leaning how to fly RC helicopters up to that level. It will probably take a lot of time to reach advanced skill levels. You can even consider FPV flying! Do not forget to use flight simulators to aid in your training! Trust me, it will save yourself from a lot of frustration.
If you liked this article, please share it with the social icons on this page! This will not only help others but also help grow our community. If you want more content like this, follow us on social media as well!
If you have any questions, or suggestions, do not hesitate to contact us or drop a comment below!